Showing posts with label d.i.y. projects. Show all posts

Thursday, 30 January 2014

Red Velvet Cake


A few years ago I got a Hummingbird Bakery book as a present, I have had so much fun making a number of the recipes but the red velvet cake has to be my favourite. After having had the book for a while, I went to London and visited the Hummingbird bakery, where inevitably I got a red velvet cupcake!

Tuesday, 28 January 2014

Memories book

front cover


I made this for my friend over Christmas. It started as a plain white book and I created dividers which can be moved through the book as she adds her photos and memories. I made the dividers based on things that were related to her, however you could make them for anything, I think a birthday one would be good especially if it was a big birthday.

Friday, 5 July 2013

Knot Just Any Bracelet...


So I am going on a girls holiday and decided to make one of these bracelets for each of my friends as a sort of souvenir for us. The pattern is formed by making knots over each of the threads so can easily be done by hand and they look great. So why not sit outside, enjoy the sunshine and make one of these bracelets!

You'll need:
  • 3 colours of thread (about 1.5m of each colour)
  • a bead
  • scissors
  • tape

Here are the instructions, I hope you enjoy making them,


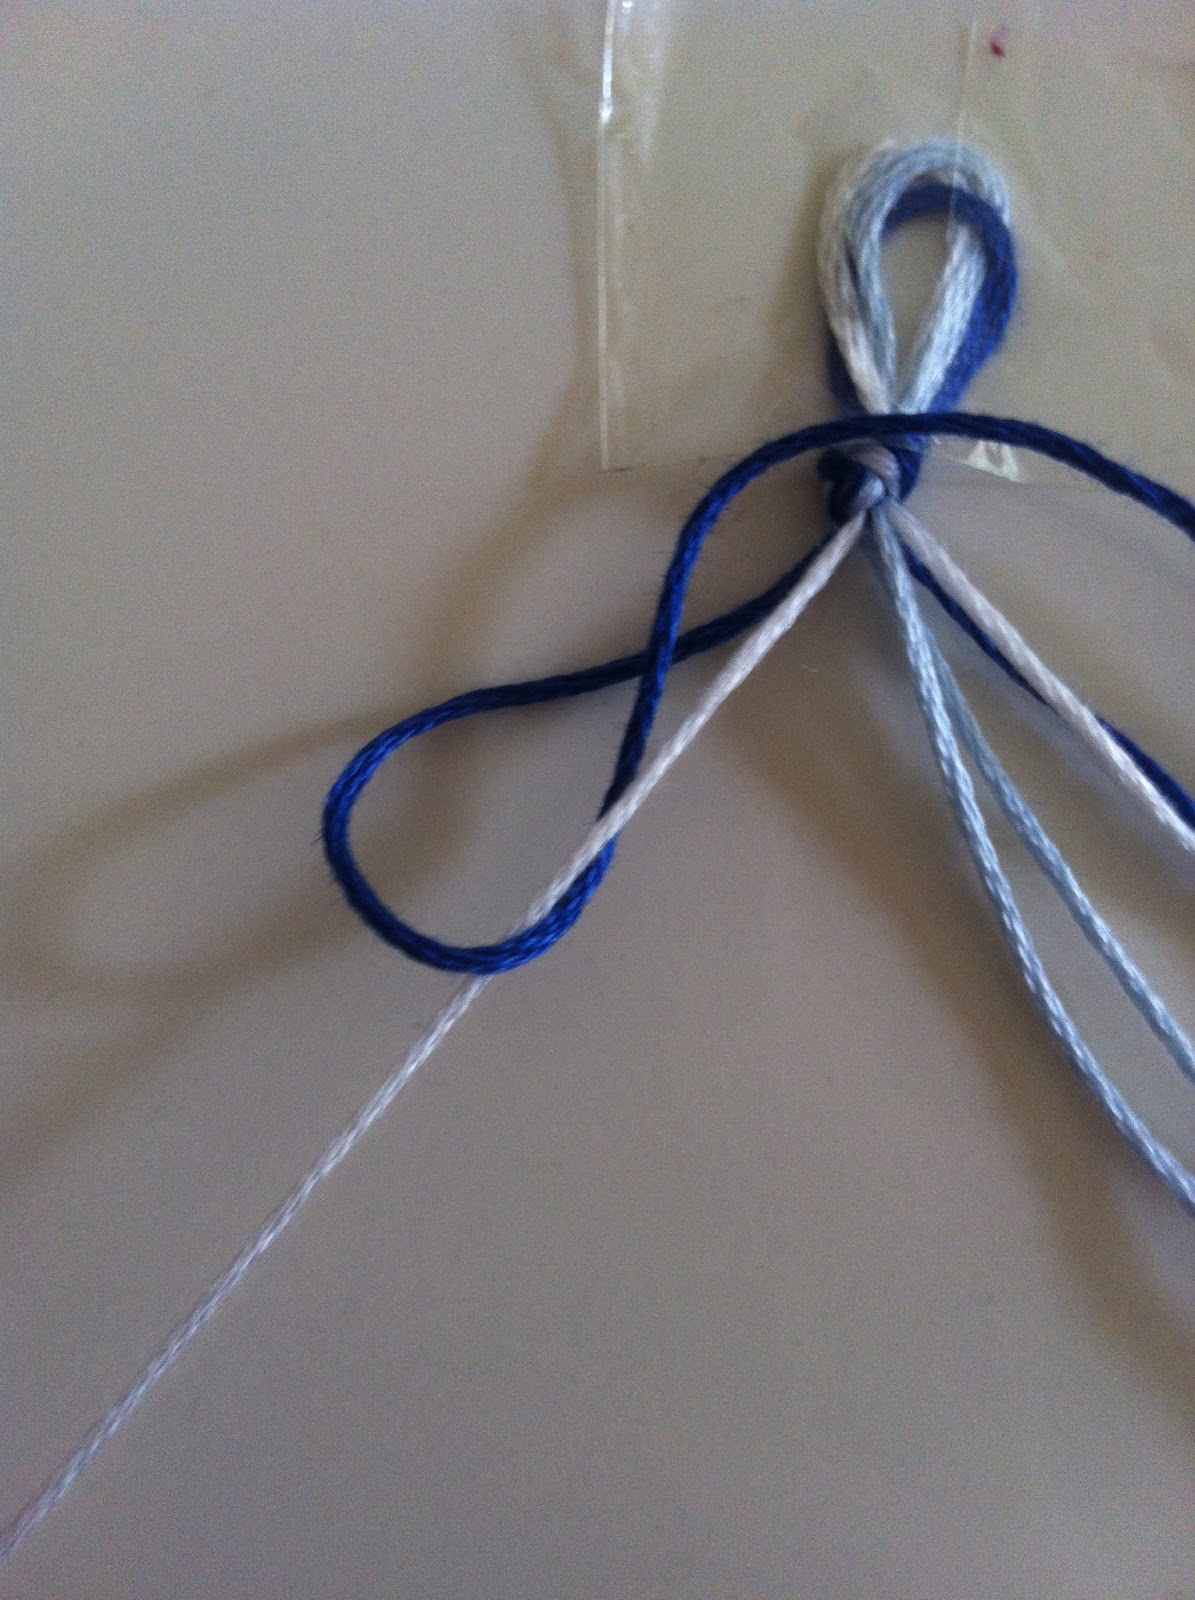
 1. Fold the threads in half and tie a knot (the loop should be just the right size to fit over your bead)
 2. Tape the knot to a surface and seperate the threads so that the left and right side consist of each colour

3. Take the furthesy thread (dark blue), bring it over the next thread (white) and then under and pull together

 4. Repeat this action so that the furthest string (dark blue) has gone around the next string (white) twice
5. Using the same thread (dark blue) follow the method in steps 3 and 4 over the most inward thread (light blue)

 6. Repeat steps 3, 4 and 5 on the three threads on the right hand side so that the threads which began furthest from the centre (dark blue) now meet at the centre
  7. Where the threads (dark blue) meet at the centre use one of the threads to form two knots over the other and pull together
 8. Repeat the same method shown in steps 3 to 7 with the thread that is now furthest from the centre (white)

 9. Soon you will see the bracelet develop and continue with the process until the desired length has been reached

10. Place a bead on the end to act as a fasten, tie together and your done!


Sunday, 23 June 2013

How Fortunate...

Ever wanted to get a more unique present for a friend's birthday? Why not try making one?


My friend and I have a bit of a tradition of making each other's birthday and Christmas gifts. This jar of paper fortune cookies is an idea I used for her recent birthday. They look great and don't take long to make! These easy to follow instructions will help you to make this. You could even try putting quotes or short memories inside the fortune cookies.

 1. cut out a circle on some nice card, I used the jar lid which was a good size
 2. fold the circle in half

3. using your finger (or a pencil) curl the two sides of the card
4. gently fold this over in the middle and watch it form a paper fortune cookie
5. insert your message